





Jump to Recipe·
[adinserter block=”5″]
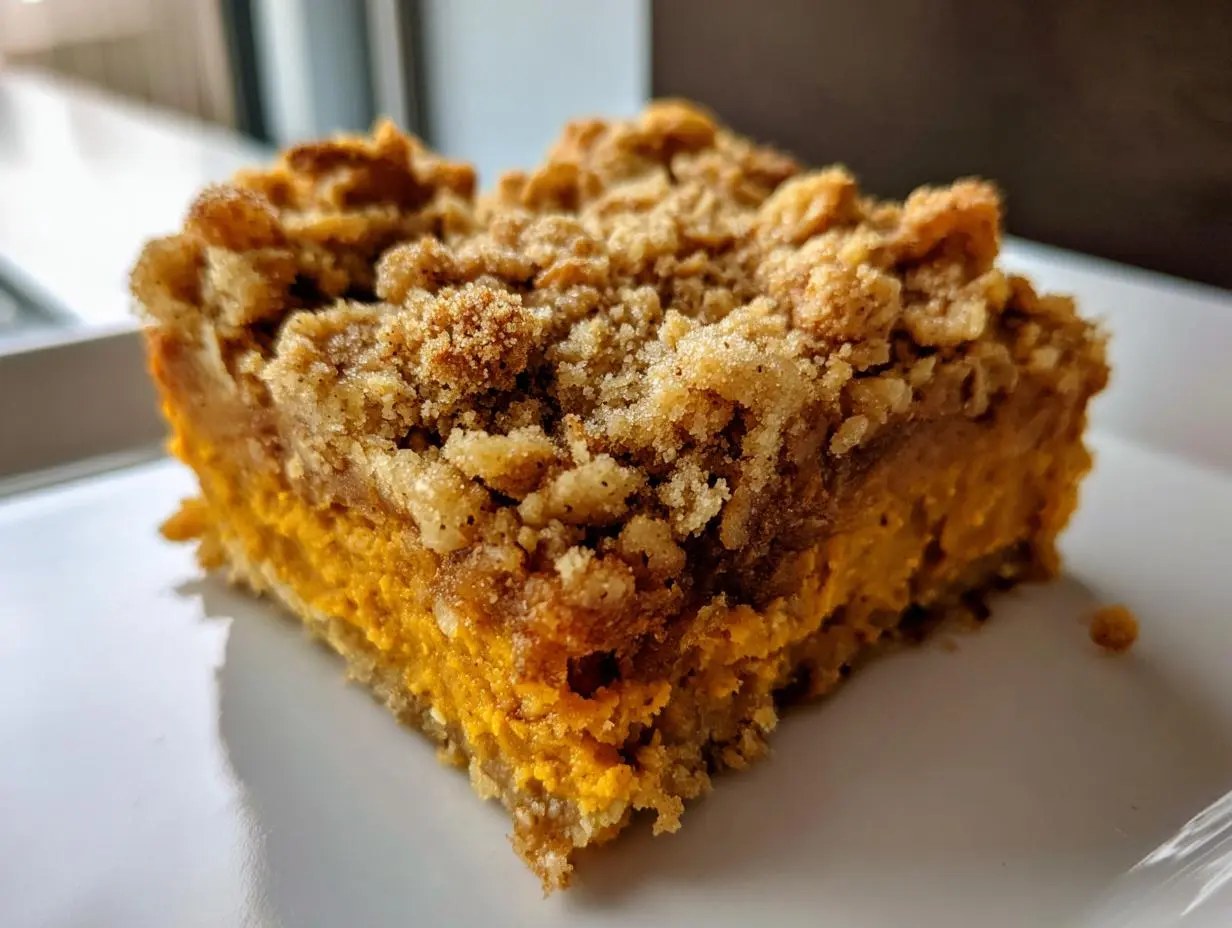
Forget wrestling with flaky pie crusts! If you want that incredible, warm, spiced flavor of Thanksgiving dessert without any fuss, you absolutely need my Pumpkin Pie Crisp. This recipe is my go-to when the first chill hits the air because it turns basic pantry items into pure autumn gold in under an hour. We’re talking about a luscious, creamy pumpkin filling topped with the crunchiest, butteriest oat topping you’ve ever tasted. Trust me, I’ve perfected my fall baking arsenal, and this one always wins!
Gather Your Ingredients for Pumpkin Pie Crisp
Okay, let’s get organized! The beauty of a crisp is how simple the ingredient list is, especially compared to a traditional pie. We are keeping this straightforward so you can get that glorious Pumpkin Pie Crisp into the oven fast. Don’t substitute the sweetened condensed milk; that’s what gives the filling that amazing, creamy texture that just melts in your mouth. Remember, precision matters here, even though we’re keeping it rustic!
Pumpkin Filling Components for Pumpkin Pie Crisp
For the rich, spiced base of this **Pumpkin Pie Crisp**, you’ll need to pull out the following items. Make sure your spices are fresh; stale spices make for bland pumpkin, and we can’t have that! You’ll need one full 15-ounce can of pumpkin puree—not the pie filling, just the plain puree. Then grab that 14-ounce can of sweetened condensed milk, two large eggs, one teaspoon of cinnamon, half a teaspoon of ginger, a quarter teaspoon of nutmeg, and just a pinch of salt to balance everything out. Whisk those until they are completely unified!

Pin It
Creating the Buttery Oat Topping
This topping is where the magic happens for our **Pumpkin Pie Crisp**! This is where my expertise comes in: the butter absolutely must be cold. I mean, stone-cold from the fridge. You’ll combine one cup of all-purpose flour with a half cup of packed brown sugar. Then, you’ll mix in a half cup of rolled oats. Now, here’s the crucial part: cut in about a quarter cup (or half a stick) of that cold, cubed butter. You want it to look like coarse little pebbles, not sand. That cold butter creates steam pockets while baking, which keeps the topping wonderfully crisp underneath!
Essential Equipment for Making Pumpkin Pie Crisp
You don’t need a whole arsenal of fancy gear for this recipe, which is another reason I love it so much! We are keeping the required tools minimal so you can whip this **Pumpkin Pie Crisp** up any weeknight. First things first, you absolutely need an 8×8 inch baking dish. If you use something bigger, your filling will be too thin, and it won’t set up right. Trust me on the size!
Next, grab a medium mixing bowl for the pumpkin base. You’ll need a whisk for that step—you want it really smooth, so get a good whisking motion going! Then, pull out a separate, smaller bowl just for mixing up the dry topping ingredients before you combine them. Finally, you need something to cut the butter into the flour mixture. I usually just use my fingertips because I like to feel when it hits that perfect coarse crumb stage, but a pastry blender works great if you prefer not to get your hands messy. Having these simple items ready means you can move through the steps without stopping to hunt for tools!
Step-by-Step Instructions for Pumpkin Pie Crisp
Alright, now that we have our ingredients lined up and our cold butter ready to go, let’s get this **Pumpkin Pie Crisp** baking! You want to start this process by getting your oven happy—preheat it to 350 degrees F, which is 175 degrees C. While that’s heating up, take your 8×8 inch baking dish and give it a good grease. I usually use a little bit of non-stick spray, but butter works too. We want things to release easily later!
Preparing the Pumpkin Base
Time to make that luxurious filling! In your medium bowl, combine the pumpkin puree, the whole can of sweetened condensed milk, and those two large eggs. Now, add in all your spices—the cinnamon, ginger, nutmeg, and salt. You need to whisk this mixture until it’s completely uniform and smooth. Don’t leave any streaks of egg or unincorporated condensed milk hiding in there! Once it looks like gorgeous, thick liquid velvet, gently pour the entire pumpkin mixture right into your prepared, greased baking dish. Set that aside for just a minute while we handle the topping.
Mixing and Applying the Crisp Topping
In your smaller, separate bowl, toss together the flour and the packed brown sugar. Now, it’s time for the cold butter you cubed earlier. Use your pastry blender—or your fingers, if you’re brave!—and work that butter into the flour and sugar until the mixture looks like coarse crumbs. You are looking for pieces about the size of small peas. Don’t overwork it! When you think it’s ready, stir in your rolled oats. Take this crumbly oat mixture and sprinkle it evenly over the pumpkin layer in the baking dish. Try to cover the whole surface so you get that crunch in every single bite!

Pin It
Baking and Setting the Pumpkin Pie Crisp
Into the preheated oven it goes! Bake this beauty for 40 to 45 minutes. You’ll know it’s done because the topping will be a lovely golden brown color, and when you gently jiggle the pan, the center filling should look mostly set—it might have a tiny wobble, but it shouldn’t look liquidy. Once it comes out, please, please let it cool slightly. If you dig in right away, you’ll burn your mouth, and the filling needs that little bit of time to firm up completely. A 10-minute rest makes a huge difference!
Tips for Perfecting Your Pumpkin Pie Crisp
I’ve made this recipe so many times I could probably do it in my sleep, but there are two little secrets I’ve learned that take it from good to absolutely unforgettable. If you follow these two points, you won’t have any soggy topping or runny centers—that’s my promise to you!
Ingredient Temperature Matters
I mentioned this before, but I have to stress it again: the butter for the topping must be cold. Seriously cold! If you use room temperature or even slightly soft butter, you end up just mixing fat into the flour, and what you get is a dense, greasy crust instead of a light, sandy crisp topping. Cold butter melts in the oven, creating steam pockets that lift the oats and flour just enough to keep things perfectly crunchy. If you forget to cube it earlier, toss those cubes in the freezer for ten minutes before you start cutting them in.
Achieving a Set Filling
When the recipe says 40 to 45 minutes, that’s just a guideline. The oven you use matters! When you check for doneness, look past the golden brown topping. Gently nudge the corner of the pan—if the center filling jiggles wildly like liquid, it needs more time. If it moves just a tiny bit, like firm gelatin, then it’s perfect. It will firm up a whole lot more as it cools on the counter. If you take it out when it’s totally firm in the oven, it’s going to be dense and slightly grainy when you finally slice it.
[adinserter block=”7″]
Ingredient Notes and Substitutions for Pumpkin Pie Crisp
I love how flexible this recipe is, even though it’s based on classic flavors. If you happen to run out of plain pumpkin puree for your **Pumpkin Pie Crisp**, don’t panic! You can absolutely substitute it with sweet potato puree. They bake up almost identically, though sweet potato might be just a touch sweeter, so maybe skip adding extra sugar elsewhere if you try that switch. Just make sure you use the plain puree, not pre-spiced pumpkin pie filling.
If you use the pie filling by mistake, you’ll end up with a filling that’s way too sweet and it probably won’t set right because the starches and sugars are already balanced for a pie crust, not a crisp topping. Stick to the puree! It keeps the flavor profile clean so that buttery oat layer can really shine on top of that gorgeous spiced base. For more baking tips and tricks, check out our general dessert recipes section.
Storing and Reheating Your Pumpkin Pie Crisp
Once this dessert cools down a bit, you need to cover it tightly with plastic wrap or foil and pop it right into the refrigerator. It stays perfectly good for about three to four days. When you’re ready for a warm slice later, the best way to reheat it is in a toaster oven or a regular oven set to about 300 degrees F. Microwaving is fast, but it tends to steam the oat topping, making it soft. A little time in a warm oven brings that buttery crunch right back! If you are looking for other great fall baking ideas, you might enjoy this old fashioned apple spice pie recipe.
Frequently Asked Questions About Pumpkin Pie Crisp
I know you’re going to love making this dessert, but sometimes little questions pop up when you’re in the middle of baking! Here are a few things folks usually ask me when they are tackling their first **Pumpkin Pie Crisp**.
Can I make the Pumpkin Pie Crisp ahead of time?
Yes, you absolutely can! You have a couple of options here. You can bake the whole thing, let it cool completely, cover it tightly, and keep it in the fridge for up to four days. When you want to serve it, just let it sit on the counter for about 30 minutes, or warm individual slices gently in the oven. Another great option is to prepare the pumpkin filling and the oat topping separately, keeping them stored in the fridge in airtight containers. Then, just assemble and bake fresh when company arrives!
What is the best way to serve this Pumpkin Pie Crisp?
Oh, this is my favorite part! While it’s delicious all by itself, serving it warm with a generous scoop of vanilla ice cream is just heavenly; the hot and cold combination is divine. If you prefer something lighter, a dollop of freshly whipped cream really complements the spices nicely. Sometimes, if I’m feeling fancy, I’ll sprinkle a tiny bit of extra cinnamon right over the whipped cream right before serving. For more inspiration on easy desserts, browse our main recipe blog.
How do I ensure my oat topping stays crisp?
This is the eternal struggle with any good crisp! The secret is ensuring that butter is cold when you mix it in, as we discussed in the tips section. After baking, if you have leftovers, the best way to maintain that crunch is to store any uneaten portions uncovered on the counter for a few hours to let any trapped steam escape, and then cover it loosely before refrigerating. If it gets a little soft overnight, just pop that slice under the broiler for about 60 seconds—watch it like a hawk!—to crisp it right back up.
Share Your Delicious Pumpkin Pie Crisp Experience
Well, that’s it! You’ve made my favorite easy fall dessert. I truly hope this recipe brings a little bit of that warm, cozy feeling into your kitchen. I always love hearing what everyone thinks! Once you’ve had a slice (especially with ice cream!), come right back here and leave a star rating. Let me know in the comments if you tried the sweet potato swap or if you stuck with the classic pumpkin flavor! For another look at a similar baked dessert, check out this external resource on pumpkin crisp.
Amazing 1-Hour Pumpkin Pie Crisp Magic
5 Stars 4 Stars 3 Stars 2 Stars 1 Star
No reviews
A simple recipe for a delicious pumpkin pie crisp featuring a spiced pumpkin base topped with a buttery oat crisp topping.
- Author: Recipes Deal
- Prep Time: 15 minutes
- Cook Time: 45 minutes
- Total Time: 60 minutes
- Yield: 6 servings 1x
- Category: Dessert
- Method: Baking
- Cuisine: American
- Diet: Vegetarian
Ingredients
Scale
- 1 (15 ounce) can pumpkin puree
- 1 (14 ounce) can sweetened condensed milk
- 2 large eggs
- 1 teaspoon ground cinnamon
- 1/2 teaspoon ground ginger
- 1/4 teaspoon ground nutmeg
- 1/4 teaspoon salt
- 1 cup all-purpose flour
- 1/2 cup packed brown sugar
- 1/2 cup rolled oats
- 1/4 cup (1/2 stick) cold unsalted butter, cut into small pieces
INSIDE_INGREDIENTS
Cook Mode Prevent your screen from going dark
Instructions
- Preheat your oven to 350 degrees F (175 degrees C). Grease an 8×8 inch baking dish.
- In a medium bowl, whisk together the pumpkin puree, sweetened condensed milk, eggs, cinnamon, ginger, nutmeg, and salt until smooth.
- Pour the pumpkin mixture into the prepared baking dish.
- In a separate small bowl, combine the flour and brown sugar.
- Cut in the cold butter using a pastry blender or your fingers until the mixture resembles coarse crumbs.
- Stir in the rolled oats.
- Sprinkle the oat mixture evenly over the pumpkin layer.
- Bake for 40 to 45 minutes, or until the topping is golden brown and the filling is set.
- Let cool slightly before serving.
Notes
- Serve warm with a scoop of vanilla ice cream or whipped cream for extra enjoyment.
- You can substitute pumpkin puree with sweet potato puree if desired.
- Ensure the butter is cold for the best crisp topping texture.
Nutrition
- Serving Size: 1 slice
- Calories: 350
- Sugar: 35g
- Sodium: 250mg
- Fat: 15g
- Saturated Fat: 9g
- Unsaturated Fat: 6g
- Trans Fat: 0g
- Carbohydrates: 50g
- Fiber: 3g
- Protein: 7g
- Cholesterol: 50mg
[adinserter block=”6″]