


Pin1
Share
Tweet1 Shares
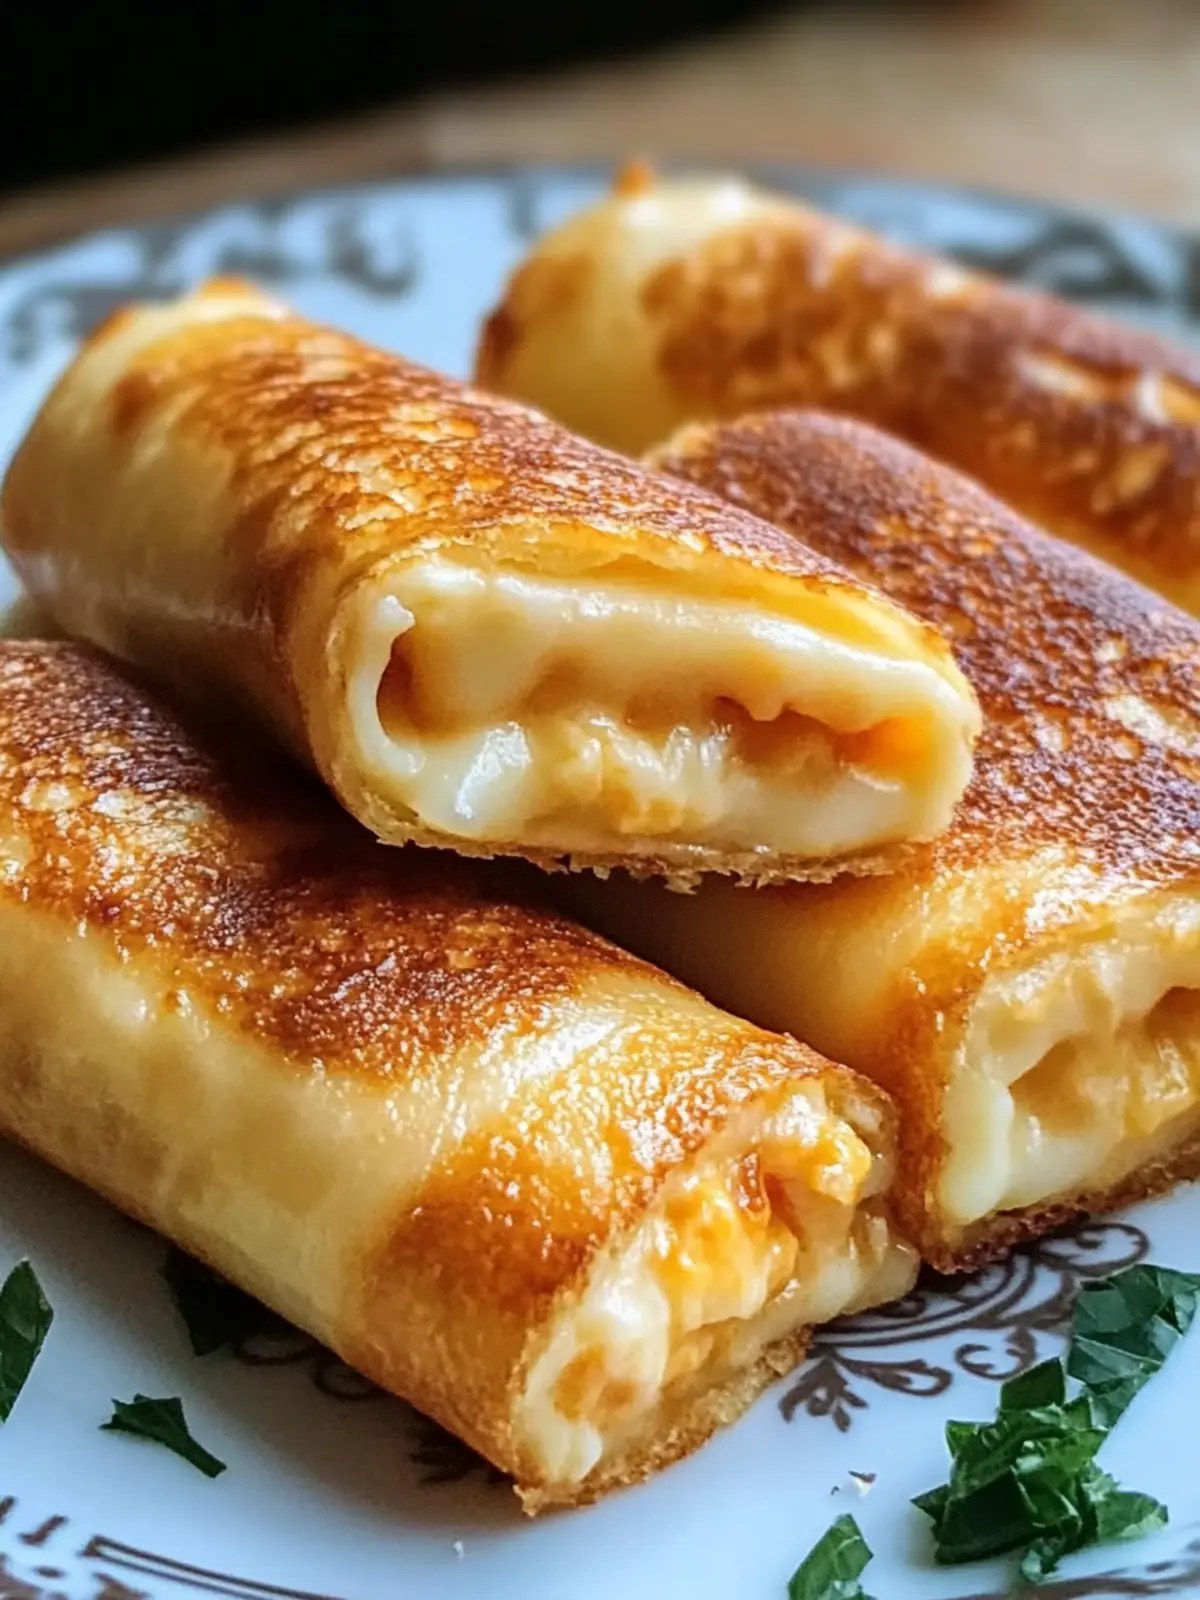
There’s a delightful comfort in the simplicity of a grilled cheese, but what if I told you we could take that nostalgia and give it a fun twist? Enter Grilled Cheese Roll Ups—those irresistible bites that are as dippable as they are delicious! These golden rolls are stuffed with gooey melted cheese, all wrapped in warm, buttery bread.
One afternoon, while looking for a quick lunch to satisfy my cravings, I utilized just a few pantry staples and created this playful twist on a classic. Perfect for buzzworthy appetizers at your next gathering, or as the ideal kid-friendly snack after school, these roll ups are sure to bring smiles all around. Plus, they take mere minutes to whip up, making them a fast favorite when you’re overwhelmed by the chaos of hectic weeknights. Let’s dive in and discover how to make this easy and satisfying dish that transforms ordinary moments into something extraordinary!

this Recipe
Why love Grilled Cheese Roll Ups?
Irresistible Crunch: The golden, crispy exterior promises a satisfying crunch that pairs perfectly with the gooey, melted cheese inside.
Quick to Make: With only a few ingredients and minimal prep time, you’ll have a delightful snack ready in no time.
Kid-Friendly Fun: These roll ups are a playful twist on a classic that kids will love, making them ideal for after-school munchies.
Versatile Options: Customize with different cheeses or adds-ins, like deli meats and veggies, for a flavorful surprise.
Dippable Delight: Serve them with a variety of dipping sauces for an elevated snacking experience, making every bite exciting. Enjoy them anytime as a quick meal or casual appetizer that’s bound to impress!
Grilled Cheese Roll Ups Ingredients
For the Roll Ups
- Bread – Use soft sandwich bread for easy rolling and avoid crusty varieties.
- Cheese – Opt for sliced cheese like cheddar or provolone; choose a thickness of about 1/8 inch for effortless melting.
- Butter – Generously spread for that golden, crisp exterior; consider using light butter for a lower-calorie option.
For Dipping Sauce
- Tomato Soup – A classic companion that enhances the comfort food experience with every bite of your grilled cheese roll ups.
- Marinara – A zesty option that adds a flavorful twist, perfect for dipping!
- Ranch Dressing – Creamy and tangy, this dressing provides a fun dip that kids will adore.
Indulge in the deliciousness of Grilled Cheese Roll Ups and enjoy the fun of dippable delight!
How to Make Grilled Cheese Roll Ups
-
Prep Bread: Gently flatten each slice of bread with a rolling pin until they’re about 1/4 inch thick. This will help them roll easily without tearing.
-
Add Cheese: Lay your slices of cheese on the flattened bread, making sure to cover them evenly without overlapping too much for a good melt.
-
Roll Up: Starting from one end, carefully roll the bread around the cheese into a tight cylinder. Ensure the cheese is snugly enclosed within the bread.
-
Heat Pan: In a skillet over medium heat, melt a generous amount of butter. You want it hot enough to create a golden crust, but not so hot that it burns.
-
Cook Roll Ups: Place the roll-ups seam-side down in the skillet. Cook for about 2-3 minutes per side or until they’re golden brown and the cheese is melting.
-
Serve Hot: Once cooked, remove them from the pan and cut into bite-sized pieces. Serve immediately with your favorite dipping sauces like tomato soup or ranch.
Optional: Sprinkle with a bit of garlic powder before serving for extra flavor.
Exact quantities are listed in the recipe card below.

Storage Tips for Grilled Cheese Roll Ups
- Room Temperature: Enjoy Grilled Cheese Roll Ups fresh for the best flavor, but if left out, consume within 2 hours to maintain safety.
- Fridge: Store in an airtight container for up to 2 days. To keep them crispy, place a paper towel inside to absorb moisture.
- Freezer: For longer storage, freeze the roll ups individually wrapped in plastic wrap, then transfer to a freezer-safe bag for up to 1 month.
- Reheating: Reheat in a skillet over medium-low heat for 3-5 minutes, turning occasionally until heated through and crispy. Avoid microwaving, as it may make them soggy.
Make Ahead Options
These Grilled Cheese Roll Ups are a fantastic option for meal prep, allowing you to save valuable time during busy weeks! You can assemble the roll-ups and refrigerate them in an airtight container for up to 2 days. To maintain their quality, ensure that you wrap them tightly to prevent drying out. When you’re ready to serve, simply heat a skillet, melt some butter, and cook the roll-ups seam-side down for about 2-3 minutes per side until they’re crispy and the cheese is bubbling. This way, you can have homemade comfort food ready to go, making mealtime stress-free and just as delicious!
Grilled Cheese Roll Ups Variations
Feel free to invent your own spin on these delightful roll-ups! Let your creativity simmer and treat yourself to a new flavor experience.
-
Spicy Kick: Swap in pepper jack cheese for a zesty twist that adds a little heat to your day. Perfect for those who crave bold flavors!
-
Meaty Addition: Add a slice of deli ham or turkey inside the roll for a protein-packed upgrade. This delicious combo will transform your snack into a hearty meal.
-
Veggie Delight: Stuff your roll-ups with thinly sliced bell peppers, spinach, or mushrooms for a nutritious boost. They’ll enhance both flavor and texture while keeping it wholesome!
-
Sweet Treat: Spread a thin layer of jelly or honey before adding cheese for a sweet-savory fusion. The unexpected sweetness will surely delight your taste buds!
-
Garlic Butter: Infuse your butter with minced garlic or herbs before cooking for an aromatic touch. Your kitchen will be filled with inviting aromas that beckon everyone to the table.
-
Cheese Variety: Experiment with different cheeses like gouda, feta, or mozzarella to discover new taste adventures. Each cheese brings its own personality, making every bite uniquely satisfying.
-
Crunchy Coating: Roll the completed roll-ups in breadcrumbs before frying for an extra crispy exterior. This delightful crunch adds an exciting layer to your dippable treat!
-
Herbed Twist: Mix fresh herbs, like basil or chives, into your butter or cheese for a fresh flavor boost. This simple addition can elevate your roll-ups to gourmet status!
Expert Tips for Grilled Cheese Roll Ups
-
Choose the Right Bread: Use fresh, soft sandwich bread for the best texture. Stale or crusty bread may tear when rolling and result in a less enjoyable experience.
-
Perfect Cheese Thickness: Aim for cheese slices around 1/8 inch thick. Thicker slices may not melt properly, while too thin may not provide enough gooey goodness.
-
Warm, Not Hot: Cooking over medium heat is crucial; it ensures the bread reaches golden perfection without burning while allowing the cheese in the Grilled Cheese Roll Ups to melt thoroughly.
-
Seal the Roll Ups: When rolling the bread, make sure to tuck the ends in to prevent the cheese from oozing out during cooking. A tight roll maximizes flavor and presentation.
-
Experiment with Dips: Elevate your Grilled Cheese Roll Ups by trying different dipping sauces. Tomato soup, ranch dressing, or marinara can add a delightful twist to your snacks.
What to Serve with Grilled Cheese Roll Ups?
There’s something wonderfully comforting about pairing delicious bites with flavorful sides that elevate your meal experience.
-
Tomato Soup: A classic match that enhances the comforting essence, it’s perfect for dipping and adds a rich, savory layer to each bite.
-
Marinara Sauce: This zesty sauce offers a fun twist, providing a flavorful option for those who love a little extra kick in their snacks.
-
Ranch Dressing: Creamy and tangy, ranch dressing is a hit with kids and adults alike, making it the perfect fun dip for after-school treat time.
-
Caesar Salad: The crisp greens and tangy dressing create a delightful contrast, making for a well-rounded meal that feels special and indulgent.
-
Pickles or Pickled Veggies: Adding a crunchy, tangy bite, pickles provide a refreshing contrast to the richness of the roll ups and keep your palate awake.
-
Sweet Potato Fries: These naturally sweet and crispy fries introduce a delightful contrast in flavors and textures, creating a satisfying and hearty meal.
-
Sparkling Apple Cider: This bubbly drink adds a touch of festivity, making even simple meals feel like a celebration while pairing well with all the food on your plate.
-
Chocolate Milkshake: For a sweet finish, a creamy milkshake can turn your snack into a delightful dessert experience, delighting everyone’s taste buds.
Grilled Cheese Roll Ups Recipe FAQs
What type of bread should I use for Grilled Cheese Roll Ups?
For the best results, use soft sandwich bread that is pliable and fresh. Avoid crusty varieties, as they can tear easily when rolling. A good option is white or whole wheat sandwich bread, which allows for easy rolling without compromising the structural integrity of your roll ups.
How long can I store Grilled Cheese Roll Ups in the fridge?
You can store your Grilled Cheese Roll Ups in an airtight container for up to 2 days. To maintain their crispiness, I recommend adding a paper towel inside the container to absorb any moisture. This little trick helps keep them deliciously crunchy when you’re ready to enjoy them again!
Can I freeze Grilled Cheese Roll Ups?
Absolutely! For long-term storage, you can freeze the roll ups. Wrap each individually in plastic wrap and then place them in a freezer-safe bag, removing as much air as possible. They will stay fresh for up to 1 month. When you’re ready to eat, simply reheat in a skillet over medium-low heat for 3-5 minutes until warm and crispy, avoiding the microwave, which can make them soggy.
How can I troubleshoot if my Grilled Cheese Roll Ups are not cooking well?
If your roll ups are not cooking evenly or the cheese isn’t melting, make sure to keep the heat at a medium level. Cooking too hot can burn the outside before the cheese melts inside. Additionally, if the bread tears during rolling, it may be too stale or crusty; always aim for fresh bread for the best outcome.
Are Grilled Cheese Roll Ups safe for kids with allergies?
While these roll ups are generally kid-friendly, you should be cautious of allergies. Always check the packaging for allergens if you’re using pre-sliced cheese or bread. To accommodate different dietary needs, consider using dairy-free cheese alternatives or gluten-free bread for kids with specific allergies.
What are some variations I can try with Grilled Cheese Roll Ups?
There’s plenty of room for creativity! You can substitute different types of cheese for a variety of flavors, such as pepper jack for a spicy kick. Adding sliced deli meats or vegetables inside the roll ups can create a more filling snack. Don’t hesitate to experiment with flavored butters, like garlic or herbs, for a gourmet twist!
Grilled Cheese Roll Ups: Your New Favorite Dippable Delight
Grilled Cheese Roll Ups are irresistible bites that are as dippable as they are delicious, offering a fun twist on a classic. Pin Recipe Prep Time 10 minutes minsCook Time 6 minutes minsTotal Time 16 minutes mins Servings: 4 roll upsCourse: APPETIZERSCuisine: AmericanCalories: 320 Ingredients Equipment Method Nutrition Notes
Ingredients
For the Roll Ups
- 4 slices soft sandwich bread
- 4 slices sliced cheese (cheddar or provolone) approximately 1/8 inch thick
- 2 tablespoons butter for spreading
For Dipping Sauce
- 1 cup tomato soup classic companion
- 1 cup marinara for a zesty option
- 1 cup ranch dressing creamy and tangy
Equipment
- Skillet
Method
Directions
- Gently flatten each slice of bread with a rolling pin until they’re about 1/4 inch thick.
- Lay your slices of cheese on the flattened bread, making sure to cover them evenly without overlapping too much.
- Starting from one end, carefully roll the bread around the cheese into a tight cylinder.
- In a skillet over medium heat, melt a generous amount of butter.
- Place the roll-ups seam-side down in the skillet and cook for about 2-3 minutes per side.
- Remove from pan, cut into bite-sized pieces, and serve immediately with your favorite dipping sauces.
Nutrition
Serving: 2roll upsCalories: 320kcalCarbohydrates: 30gProtein: 12gFat: 18gSaturated Fat: 10gCholesterol: 40mgSodium: 700mgPotassium: 200mgFiber: 1gSugar: 2gVitamin A: 500IUCalcium: 200mgIron: 1mg
Notes
Optional: Sprinkle with a bit of garlic powder before serving for extra flavor.
Tried this recipe?
Let us know how it was!
Pin1
Share
Tweet1 Shares
CONTENT END 1


