




Jump to Recipe·
[adinserter block=”5″]
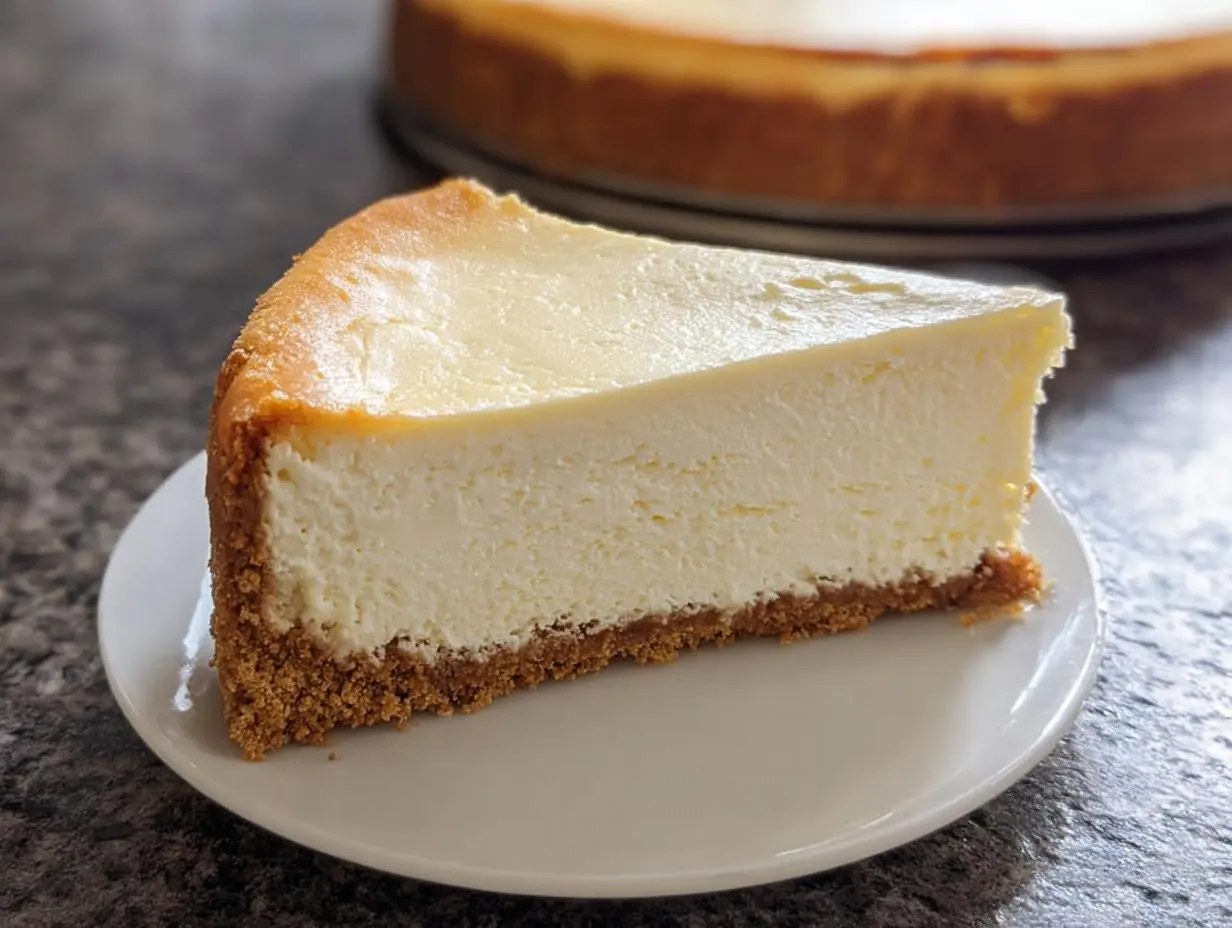
Oh my goodness, I am so excited you’re diving into this! Forget those dry, crumbly versions you might have tried before. Today, we are making the Creamy Cheesecake Recipe that tastes exactly like the ones you pay way too much for at fancy bakeries. Seriously, it’s shockingly easy to get that perfect, melt-in-your-mouth texture right here in your own kitchen. It’s my go-to dessert for every single celebration, and people always ask for the secret.
The real magic here isn’t complicated; it’s all about patience and making sure your ingredients are happy before they meet the mixer. When you follow these steps, you get that signature, dense, yet incredibly smooth result. Trust me, once you master this classic dessert, you won’t ever need another recipe.
Gathering What You Need for the Creamy Cheesecake Recipe
Okay, before we even think about turning on the oven, we need to make sure our ingredient lineup is perfect. A great cheesecake starts with great components, and honestly, the quality of your cream cheese matters more than you think! Don’t try to substitute anything here; this recipe is designed to work perfectly with these exact items. We need to prep everything so we can move fast when it’s time to mix.
You’ll notice we have two separate sugar amounts. That’s because the crust gets a little sweet kick, and the filling needs the rest to balance that tanginess. Make sure you have everything measured out before you start beating the cheese!
Ingredients for the Graham Cracker Crust
- 1 1/2 cups graham cracker crumbs
- 1/4 cup granulated sugar
- 6 tablespoons unsalted butter, melted
Ingredients for the Rich Cheesecake Filling
This is where the dream happens! For the absolute best results in this Creamy Cheesecake Recipe, your cream cheese needs to be truly soft. I mean room temperature soft—leave it out for at least two hours. If it’s cold, you’ll end up with lumps, and we absolutely do not want lumps!

Pin It
- 3 (8 ounce) packages cream cheese, softened
- 1 1/2 cups granulated sugar
- 1 teaspoon vanilla extract
- 1/4 cup heavy cream
- 4 large eggs
Essential Tools for Your Creamy Cheesecake Recipe
You don’t need a commercial kitchen for this masterpiece, but you do need a couple of specific items to nail that smooth texture. First things first: you absolutely must use a 9-inch springform pan. Trying to get a cheesecake out of a regular cake pan is a recipe for disaster, trust me!
Next, you’ll want an electric mixer—either a stand mixer or a hand mixer works fine. We need to beat that cream cheese until it’s like silk. Also, grab a couple of good, sturdy mixing bowls. Having one for the crust and one for the filling keeps things tidy. Oh, and don’t forget the heavy-duty aluminum foil if you decide to use that water bath trick later on!
Step-by-Step Preparation of the Creamy Cheesecake Recipe
Now we get down to the fun part! Baking cheesecake is a process, not a sprint, and timing is everything, especially when it comes to getting that beautiful, crack-free top. Follow these steps exactly, and you’ll have a bakery-quality treat in no time. Remember, we are moving from high heat for the crust to lower, slower heat for the main bake.
Preparing and Pre-Baking the Crust
First things first: we need to get that oven warmed up! Preheat it to 350 degrees F (175 degrees C). While that’s heating, mix up your crust ingredients. Combine those graham cracker crumbs, the 1/4 cup of sugar, and the melted butter until everything looks like wet sand. You want it moist enough to hold together.
Press this mixture firmly and evenly into the bottom of your 9-inch springform pan. I use the bottom of a flat measuring cup to really compact it down—you want a solid base! Pop that crust into the preheated oven and bake it for exactly 10 minutes. Once that time is up, pull it out and let it cool down a bit while you adjust the oven temperature. Drop that heat down to 325 degrees F (160 degrees C). That lower temperature is crucial for the filling!
Mixing the Smooth Cheesecake Filling
This is where you need to be gentle! In a large bowl—and remember, your cream cheese should be super soft—beat that cream cheese until it looks completely smooth, like silk. There can be zero lumps here! Once it’s creamy, slowly beat in the 1 1/2 cups of sugar until they are just combined. Don’t whip air into it yet!
Next, stir in the vanilla extract and the heavy cream. Now, this is the most important warning I can give you for a perfect texture: add the four eggs one at a time. After each egg goes in, mix only until it disappears into the batter. Seriously, as soon as it’s blended, stop the mixer! Overmixing after the eggs are added is the number one cause of cracks later because you incorporate too much air.
Baking and Cooling Protocols for a Crack-Free Creamy Cheesecake Recipe
Pour that lovely, smooth filling right over your slightly cooled crust. Pop it into the 325-degree oven. It needs to bake for about 50 to 60 minutes. How do you know it’s done? The edges should look set, but if you gently nudge the pan, the very center should still have a tiny jiggle, like soft gelatin. It’s not supposed to be firm all the way through!
Here’s the secret to avoiding a tragic collapse: cooling slowly! Turn the oven off completely, but leave the cheesecake right inside. Prop the oven door slightly ajar—I usually stick a wooden spoon in the door to keep it open a crack—and let it hang out in that residual heat for a full hour. This slow temperature transition is what keeps the top smooth. After that hour, take it out, let it cool completely on the counter, and then it absolutely must chill for at least four hours, but honestly, overnight is always best for the ultimate flavor and firmness.
Tips for a Truly Exceptional Creamy Cheesecake Recipe
There are a few little secrets I learned over the years that separate a good cheesecake from a spectacular one. These aren’t complicated steps, but they make a huge difference in the final texture and presentation. If you want that picture-perfect, smooth slice every time you make this Creamy Cheesecake Recipe, pay close attention to how and when you mix things!
Mastering Ingredient Temperature and Mixing Technique
I mentioned it before, but it bears repeating: room temperature ingredients are non-negotiable! If your cream cheese is cold, you’ll struggle to get it smooth, and you’ll end up mixing longer trying to fix it. Longer mixing means more air, and more air means cracks later on. So, plan ahead! Also, once those eggs are in, treat the batter gently. You only need to mix until you can’t see streaks of yellow anymore. Stop the machine! That aggressive whipping after the eggs go in is what causes the batter to puff up too much, and when it cools, it shrinks too fast, leading to those awful fissures across the top.
The Role of the Water Bath in Your Creamy Cheesecake Recipe
[adinserter block=”7″]
If you are nervous about your oven being too dry or hot, you absolutely have to try the water bath method. It’s my insurance policy, especially when I’m baking for a big event! To set it up, take your springform pan and wrap the outside bottom and sides very securely with heavy-duty aluminum foil—use a couple of layers to prevent leaks. Place that wrapped pan inside a larger roasting pan.
When you put the cheesecake in the oven, pour hot water into that outer roasting pan until the water comes about halfway up the side of your springform pan. The steam from the water creates a moist, gentle cooking environment. It keeps the temperature even and steady, which is the absolute best environment for a truly creamy result.

Pin It
Frequently Asked Questions About the Creamy Cheesecake Recipe
I get so many messages asking about tiny issues people run into! Cheesecake can be temperamental, but most problems are easily fixed once you know the cause. Here are the top three things people ask me when they try to make this decadent dessert.
Why Did My Creamy Cheesecake Recipe Crack?
Oh, the dreaded crack! This almost always happens for one of two reasons: either you overmixed the batter after adding the eggs, whipping in too much air, or you cooled it down too fast. Remember my rule? Turn the oven off and let it sit inside for an hour! If the temperature changes too quickly, the structure collapses and cracks appear on the surface. Don’t panic, though; a little sour cream topping hides cracks perfectly!
How Long Must the Cheesecake Chill Before Serving?
This is the hardest part of the whole process—waiting! You absolutely must let it chill for a minimum of four hours. That gives the fats time to firm up and the texture to set properly. However, if you want the deepest, richest flavor and the absolute best texture for slicing, leave it in the fridge overnight. It tastes so much better the next day!
Storing Leftovers of Your Creamy Cheesecake Recipe
This cheesecake is actually fantastic the next day! Once you’ve sliced it up, cover the remaining portion tightly with plastic wrap, making sure the wrap doesn’t touch the exposed top if you didn’t use a topping. It stays perfectly fresh in the refrigerator for up to five days. Honestly, I think it tastes even better on day two once everything has fully settled!
Understanding the Approximate Nutrition Facts for This Creamy Cheesecake Recipe
Listen, I’m a baker, not a nutritionist, so take these numbers with a grain of salt—or maybe a sprinkle of graham cracker dust! These figures are just estimates based on the standard ingredients we used for this rich and creamy version. If you swap out ingredients, the numbers will change, of course. But it gives you a general idea of what you’re enjoying when you have a perfect slice of this classic dessert! For more general baking advice, check out this guide to baking questions.
Key Nutritional Snapshot
- Serving Size: 1 slice
- Calories: 450
- Fat: 30g
- Carbohydrates: 40g
- Protein: 8g
Share Your Experience Making This Creamy Cheesecake Recipe
I truly hope you loved making this! If you followed along and ended up with a gorgeous, smooth slice, please come back and leave me a rating and tell me how it went. I love hearing about your baking triumphs! If you are looking for other dessert ideas, you might enjoy this homemade key lime pie recipe.
Master 1 Creamy Cheesecake Recipe Secret
5 Stars 4 Stars 3 Stars 2 Stars 1 Star
No reviews
A simple recipe for a rich and creamy classic cheesecake.
- Author: Recipes Deal
- Prep Time: 20 minutes
- Cook Time: 60 minutes
- Total Time: 5 hours 20 minutes
- Yield: 10 servings 1x
- Category: Dessert
- Method: Baking
- Cuisine: American
- Diet: Vegetarian
Ingredients
Scale
- 1 1/2 cups graham cracker crumbs
- 1/4 cup granulated sugar (for crust)
- 6 tablespoons unsalted butter, melted
- 3 (8 ounce) packages cream cheese, softened
- 1 1/2 cups granulated sugar (for filling)
- 1 teaspoon vanilla extract
- 1/4 cup heavy cream
- 4 large eggs
INSIDE_INGREDIENTS
Cook Mode Prevent your screen from going dark
Instructions
- Preheat your oven to 350 degrees F (175 degrees C).
- Mix graham cracker crumbs, 1/4 cup sugar, and melted butter. Press firmly into the bottom of a 9-inch springform pan.
- Bake the crust for 10 minutes. Remove and let cool slightly.
- Reduce oven temperature to 325 degrees F (160 degrees C).
- In a large bowl, beat the softened cream cheese until smooth.
- Gradually beat in the 1 1/2 cups sugar until just combined.
- Mix in the vanilla extract and heavy cream.
- Beat in the eggs one at a time, mixing just until blended after each addition. Do not overmix.
- Pour the filling over the cooled crust.
- Bake for 50 to 60 minutes, or until the edges are set but the center still jiggles slightly.
- Turn off the oven and let the cheesecake cool in the oven with the door ajar for 1 hour.
- Remove from the oven and cool completely on a wire rack.
- Refrigerate for at least 4 hours, or preferably overnight, before serving.
Notes
- For a water bath, wrap the outside of the springform pan securely in heavy-duty aluminum foil before placing it in a larger roasting pan. Fill the roasting pan with hot water halfway up the side of the springform pan before baking.
- Avoid overmixing the batter once the eggs are added to prevent cracks.
- Room temperature ingredients mix better for a smoother texture.
Nutrition
- Serving Size: 1 slice
- Calories: 450
- Sugar: 35g
- Sodium: 250mg
- Fat: 30g
- Saturated Fat: 18g
- Unsaturated Fat: 12g
- Trans Fat: 0.5g
- Carbohydrates: 40g
- Fiber: 1g
- Protein: 8g
- Cholesterol: 150mg
[adinserter block=”6″]